As a professional Overwatch 2 player currently ranked #230, I’ve constantly questioned whether my mouse sensitivity is truly optimal. The sensitivity debate has raged since OW2’s launch, especially with tactical shooter veterans bringing different expectations to Blizzard’s faster-paced arena. After analyzing nearly 100 pro players’ settings in Liquipedia and official interviews, I’m sharing definitive data to help you optimize your aim.
Why Sensitivity Matters More Than You Think
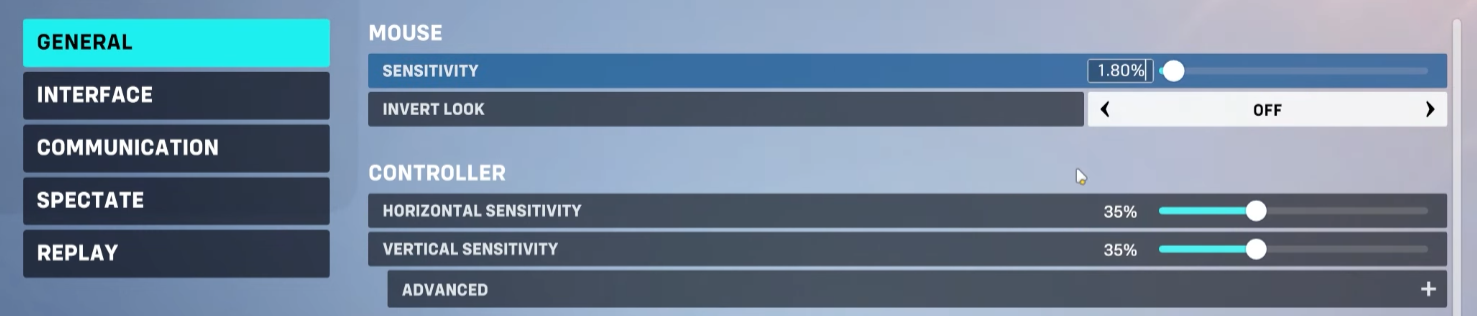
Sensitivity is your most adjustable aiming variable, but it interacts with:
Mouse weight & grip style
Natural range of motion
Posture and desk setup
Critical Insight: Your height significantly impacts ideal sensitivity due to biomechanics
Overwatch vs. Tactical Shooters
Unlike Valorant or CS:GO which favor low-sens precision, OW2 demands:
Match eDPI when changing DPI: 800DPI × 5 sens = 1600DPI × 2.5 sens
Adjust Windows pointer speed if desktop feels too fast
The Final Verdict
While outliers exist (like Haskal’s 20k eDPI Genji), 95% of pros fall within these ranges. If your settings differ drastically and you’re struggling, experimentation is warranted. Remember:
Re-evaluate after hardware changes
Adjust for posture/desk changes
Balance precision vs. mobility needs
At the end of the day, sensitivity remains personal preference – but preference favors proven performance. As someone with multiple Top 500 seasons using consistent settings, I encourage you to let data inform your choices, not dictate them.Welcome to the Overwatch 2 Stadium, where chaos meets opportunity and synergy makes the difference between a crushing defeat and a clean sweep. I’m Brainheardt, a TOP 500 Support & DPS main with 6000+ hours on PC Overwatch 2 alone, I’ve clawed my way through every stage of this chaotic mode. Currently sitting at a 75%+ win rate I’ve learned to trust a few key strategies and adaptive mindsets that turn average lobbies into stomps. Here are the five most important Stadium tips that will help you climb fast especially as a Support, though most of this applies across roles.
1. Lock in a Winning Build Early — But Stay Ready to Pivot
If you’re not building a loadout in rounds 1–2 that guarantees you survive and scale, you’re already playing catch-up. I religiously open with three items that boost my survivability and healing throughput:
First Aid Kit (1500) — +25 Shields, 33% faster regen delay. Keeps you alive between engagements.
Charged Plating (1000) — After Ult usage, +25 Armor and +10% Ability Power. Great post-ult sustain.
Martian Mender — +25 Health, 10% cooldown reduction, 3% health per second. Your passive health regen forces enemies into awkward commitments or wasted cooldowns.
But here’s the trick: by round 3 or 4, I’m ready to sell half of these if the enemy comp evolves. Is their aim garbage? Easy. I swap into Battle Mercy, stack Attack Speed, and start farming eliminations before they can react. Getting focused? Flip your build—add Reveal on Ping and start playing information support. Your DPS will carry when you serve them targets on a silver platter.The goal is always proactive adaptation. Locking into a “one-trick” mindset kills your climb.
2. Play Mercy Like an Assassin — When It Makes Sense
Too many players think playing Mercy in Stadium means pocketing forever. That’s a fast track to irrelevance once the match tilts. If the enemy team doesn’t respect your aggression, it’s their funeral.Buff your Guardian Angel range, reduce your cooldowns, and spec into Attack Speed. With the right build, Mercy becomes a blender in heels, ducking between teammates while dishing out shocking damage. Then, reset to safety like nothing happened. The best part? This forces opponents to build anti-flank tools, making their comps predictable and easier to dismantle.Rez logic is equally vital. Always prioritize reviving:
The First to Fall (if safe).
The 2nd Support, especially when Tanks drop in unsafe positions.
Supports offer more sustained value than trying to Rez a tank under fire. Keep your second healer alive and the whole squad becomes harder to break.
3. Avoid Midnight Queue Madness
I’ve clocked enough late-night games to confirm a pattern: the matchmaking pool from 10 PM to 4 AM gets chaotic. If you want consistency, climb outside of that window. Skill deltas are more manageable, build metas stabilize, and you face fewer smurf stacks and troll queues.Also, night queue brings wild build variance, which can be either fun or disastrous depending on your expectations. If you’re testing theory-crafts or off-meta builds, queue then. If you’re grinding rank? Do it during peak hours.
4. DPS and Tank Builds: Adapt to the Enemy Tank
Most people tunnel on DPS output or personal sustain. Here’s the secret sauce: build to counter the enemy tank, not just to win duels.Here’s a breakdown of effective counters:
Reinhardt (AP Firestrike build): Anti-Armor + Firestrike Reflect perks punish him hard. If he’s going shield-heavy, grab Anti-Barrier and ignore him while deleting his backline.
Zarya: Armor reduces her beam tick damage by 30%. Stack damage resistance per tick. Speed debuffs + barrier shreds pop her bubble fast.
Junker Queen: Stack Anti-Heal, debuff resistance, and speed reduction to shut down her self-sustain.
Orisa: Skip Fortify builds. Use burn damage, Overheat cooldown reduction, and Weapon Damage to delete her before she resets.
D.Va: Anti-Armor and tick-based damage resistance let you outlast her and bait overcommits.
This applies to DPS too. Cassidy thrives on burst-exit builds with fan/roll combos. Ashe punishes clumped teams with Dynamite + Weapon Power. Moira is at her strongest with passive damage builds like Chain Grasp and Multi-Orb. Don’t waste perks on situational mechanics if you can build for always-on value.
Here’s a cheat sheet for quick wins if you’re solo queueing or trying new heroes:
Tank — Reinhardt (Firestrike Build)
Double Firestrike
+Ability Power
Prioritize: Firestrike Size > Cooldown > Velocity
Shield only to reset or bait. Use Pin after Firestrikes to finish.
Tank — Zarya (DPS Build)
Max beam uptime
Cooldown bubble spam
Overwhelm squishies. 25K damage per game isn’t rare.
DPS — Cassidy (Fan the Hammer Build)
Boost Peacekeeper damage
Flashbang drop + Headshot-Roll synergy
Fan > Roll > Fan = secure fast kills
Support — Moira
Avoid Empower builds
Best perks: Cross Orbital, Chain Grasp, Multi-Orb, Precarious Potency
Always be outputting damage—you’re not just a pocket healer
Final Thoughts
Stadium is a unique beast—it rewards adaptation, build knowledge, and raw tempo. Learn when to stay the course and when to rip apart your entire setup mid-match. Pay attention to team synergies, enemy tanks, and your own survivability. Mercy mains: get aggressive when it’s safe and keep Rez smart.There’s more to explore in every round, and each new opponent teaches something. Don’t sleep on your first 2 rounds. Don’t stay locked into a dead build. And most importantly—don’t blame your team before you’ve optimized your own role.Now go climb.Ranked play remains a cornerstone of the Overwatch 2 experience in 2025, with Blizzard continuing to refine the competitive system that determines player placement. For both newcomers and veterans, understanding how placement matches work can help set realistic expectations and reduce anxiety when entering the competitive arena.
How Placement Matches Work in 2025
The most important thing to understand about Overwatch 2’s ranked system in 2025 is that full rank resets are rare. They typically occur only once or twice annually, with the most recent reset having taken place last season. This means players returning to competitive play will find their previous ranks serving as the foundation for new placements.When you begin your placement matches, the system uses your existing rank as a starting point. For example, if you ended the previous competitive season at Gold 4, your initial placement matches will likely place you in Gold-tier lobbies. Your performance in these matches then determines whether you climb or fall.
The Placement Algorithm
The placement algorithm works dynamically during your matches. If you dominate your initial games, the system will rapidly adjust, placing you in progressively higher-ranked lobbies – perhaps moving from Gold to low Platinum. Conversely, consecutive losses will result in placement against lower-ranked opponents.This adaptive approach helps the system efficiently find where your current skill level best fits. The goal is to place you where you’ll achieve approximately a 50/50 win rate, representing a fair challenge for your abilities.
What Actually Matters in Placements
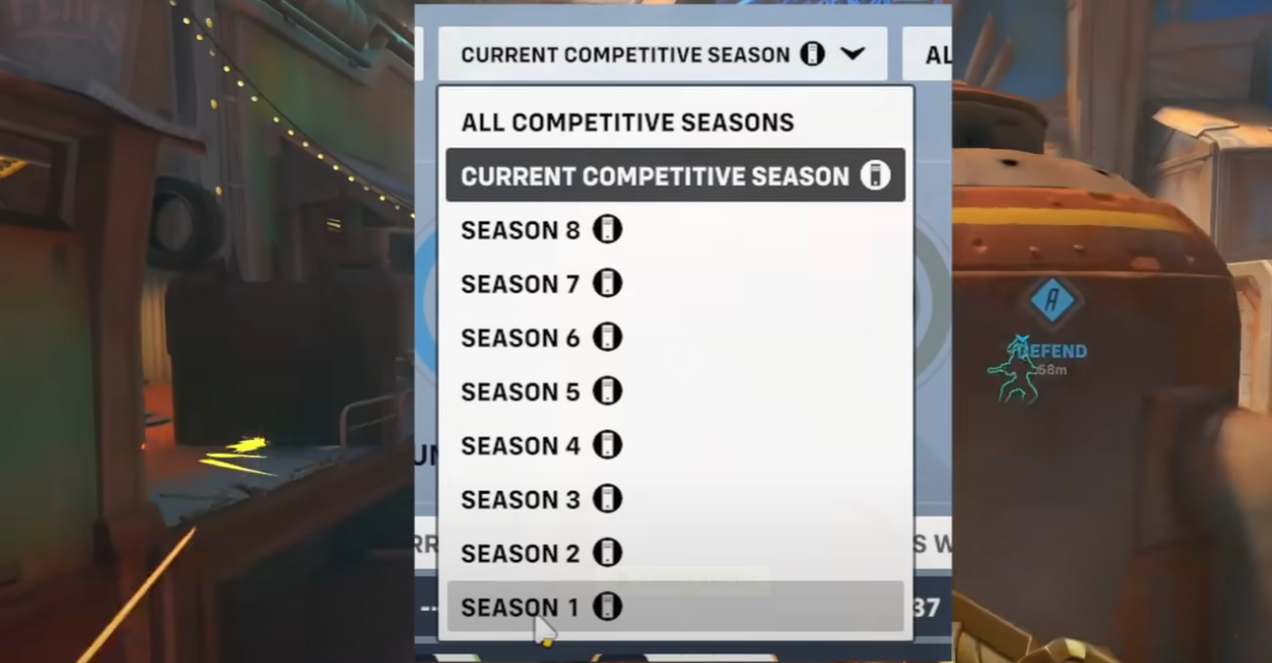
Despite common misconceptions, only wins and losses impact your rank determination in 2025. Individual performance metrics like eliminations, healing, or damage don’t factor into the calculation. This design encourages team-oriented play rather than stat-chasing behavior.Your climbing speed depends on your win consistency. Players maintaining win rates significantly above 50% will climb faster than those hovering just above the even mark. Conversely, sub-50% win rates will result in deranking as the system determines you’re placed higher than your current skill level warrants.
Role-Specific Rankings
Overwatch 2 continues to maintain separate competitive rankings for each role. Your Tank, Damage, and Support ranks operate independently, allowing for vastly different placements based on your proficiency in each role. It’s entirely possible to achieve Diamond rank as a Tank while remaining in Bronze as a Damage player.
New Accounts and Placement
For players creating fresh accounts in 2025, the system uses Quick Play performance data to establish a baseline for competitive placement. This explains why many new accounts might start with different predicted ranks than expected.The system requires approximately 50 Quick Play games to gather sufficient data before forming an initial competitive assessment. This data then informs your early placement matches, with your final rank determined by your performance across all placement games – with later matches carrying more weight than earlier ones.Most players won’t see accurate predicted ranks until they’ve completed 8-9 placement matches, as the system needs this data volume to make reliable assessments.
The 2025 MMR Adjustment
Blizzard implemented a “soft reset” or “MMR squish” this year, compressing the ranked distribution. This means even top-tier players experienced some downward adjustment, with many Top 500 players finding themselves initially placed in Diamond or Masters ranks.
Final Thoughts
Understanding Overwatch 2’s placement system helps alleviate the pressure many players feel. Rather than viewing placements as high-stakes evaluations, consider them the beginning of your competitive journey. The system is designed to continuously adjust your rank as your skills evolve, ensuring challenging but fair matches regardless of where you initially place.
Duo Boosting is the Best Way to Guarantee High Placement Ranks
Starting your competitive season with strong placement matches is crucial, and duo boosting is the most reliable method to secure high ranks in Overwatch 2’s 2025 competitive system. Unlike solo queue, where match outcomes can feel unpredictable, duo boosting allows you to pair up with a skilled teammate—whether a trusted friend or a professional booster—to maximize win consistency for placements.Some players in the Gold ranks often face the daunting challenge of dealing with the infamous Pharmercy combo – a Pharah and Mercy duo that can easily dominate the battlefield. As a Gold 4 player with decent aim, you may find yourself struggling to take down this powerful combination, even when you have the skills to do so.
The Problem:
The Pharmercy combo thrives on the synergy between the two heroes. Mercy’s healing and damage boost make Pharah nearly immortal, while the rest of the enemy team focuses on protecting their Mercy. This makes it incredibly difficult for a single player to take them down, as any attempt to get an angle on either hero often results in being dove by the rest of the enemy team.To make matters worse, teammates in Gold ranks may not always be aware of the best way to counter this strategy. They may stick to their comfort picks, such as Lucio, Reinhardt, Brigitte, or Bastion, which may not be the most effective against a Pharmercy.
Solutions:
Communication is key. Politely ask your team to consider switching to heroes that can better deal with the Pharmercy, such as hitscan DPS like Ashe, Soldier: 76, or Cassidy. If your team is not responsive, focus on what you can control.
Target the enemy’s other support. If you can’t directly counter the Pharmercy, disrupt their team by targeting their other healer. This forces Mercy to choose between healing Pharah or the other support, creating an opening for your team to capitalize on.
Use cover and be mindful of your positioning. When engaging the Pharmercy, use cover to avoid being an easy target and position yourself in a way that maximizes your effectiveness while minimizing your exposure to enemy fire.
Consider switching to a hero that can better deal with the Pharmercy, such as Sombra, Sojourn, or Tracer. These heroes can put pressure on the enemy backline, forcing the Mercy to reposition and disrupting the Pharmercy’s effectiveness.
If all else fails, mirror the strategy. Sometimes, the best way to counter a Pharmercy is to play Pharah yourself. Even without a dedicated Mercy pocket, you can often outplay the enemy Pharah and create space for your team. If your teammates don’t have enough skill to take down the enemies, consider looking for a Duo Carry for your rank games.
Conclusion:
Dealing with a Pharmercy combo can be frustrating, especially in the Gold ranks where team coordination and hero picks may not always be optimal. However, by communicating with your team, targeting key enemies, positioning yourself carefully, and adapting your hero selection, you can overcome this challenge and lead your team to victory.Remember, overcoming a Pharmercy is a team effort. While it may feel like you need to solo-carry, focusing on what you can control and working with your team is the key to success. Stay positive, communicate effectively, and keep improving your skills, and you’ll be well on your way to climbing the competitive ladder.Reaper is a powerful and intimidating hero in Overwatch, known for his close-range combat prowess and ability to flank enemies. If you’re looking to improve your Reaper gameplay, especially against heroes like Winston, this guide will provide you with valuable tips and strategies to help you dominate the battlefield.
Tip 1: Embrace the Art of Flanking
One of the most crucial aspects of playing Reaper effectively is mastering the art of flanking. Reaper excels at sneaking up on unsuspecting enemies and quickly eliminating them with his devastating shotguns. Utilize cover and surprise your opponents by popping out when they least expect it.
Tip 2: Play Around Cover
As a close-range hero, Reaper is particularly vulnerable to long-range attacks. To mitigate this weakness, always play around cover. Use walls, obstacles, and corners to your advantage, popping out when enemies are within your effective range.
Tip 3: Balancing Backline Protection and Pressure
Reaper players often face the challenge of balancing backline protection with applying pressure and assisting their fellow DPS. Assess the situation and adapt your playstyle accordingly. If your supports are under threat from divers like Winston, prioritize peeling for them. However, when the opportunity arises, flank and apply pressure to the enemy backline.
Tip 4: Timing Your Flanks
Timing is everything when it comes to flanking as Reaper. Coordinate with your team and choose the right moments to engage. As your team pushes forward, become a distraction for the enemy, forcing their attention away from the main fight. Remember, if the enemy Ana is focused on you, she’s not keeping her team alive.
Tip 5: Wraith Form for Disengagement
Wraith Form is Reaper’s most valuable ability, allowing him to become invulnerable and quickly reposition. However, it’s crucial to use it wisely. In most cases, Wraith Form should be used for disengagement rather than engagement. Use it to escape dangerous situations, preferably towards a health pack or your nearest support. It’s always nice to play with a support who actually knows how to play, if you’ve been getting bad teammates in your games, there are options like cheap Duo Carry. No shame in getting some help along your rank journey.
Tip 6: Shadow Step for Flanking
Shadow Step is Reaper’s teleportation ability, enabling him to quickly traverse the map and find advantageous positions. Use Shadow Step to get angles out of the enemy’s line of sight, and try to be stealthy to avoid detection. While enemies may hear you, cheeky teleports can catch them off guard.
Tip 7: Death Blossom Usage
Death Blossom, Reaper’s ultimate ability, can be a game-changer when used effectively. Its usage depends on the enemy team’s composition and their ability to counter it with crowd control. Don’t always expect multi-kills, as enemies can easily escape or interrupt the ability. Sometimes, using Death Blossom to secure even a single high-value target can be worthwhile.
Final words:
Mastering Reaper requires a combination of flanking skill, situational awareness, and effective ability usage. By following these tips and adapting your playstyle to the enemy team’s composition, you can become a formidable force on the battlefield. Remember to always communicate with your team, coordinate your flanks, and prioritize high-value targets. With practice and persistence, you’ll be well on your way to becoming a top-tier Reaper player.As an Ana player trying to rank up this season, I’ve encountered a consistent problem: Widowmaker and Ashe. While it’s not typically Ana’s job to deal with these long-range hitscans, I’ve had multiple games where they’ve been shredding our team, and nobody is taking the initiative to counter them. So, what can I do as an Ana player in these situations without switching off the hero?Top 500 Ana Main Wonfella, currently sitting at a 59% win rate over 12 hours this season, shared some valuable advice. The number one tip against Ashe and Widow as Ana is to never scope unless you are 100% sure they can’t see you or reposition to gain line of sight on you. Scoping in reduces your movement by 65% and cuts down your FOV significantly, making it harder to realize when they gain sight on you. Remember that it is not bad to reach for help if you seem stuck. There are services like Duo Carry that can help you learn and rank up.Trying to kill them on your own is not recommended. Instead, mark them with one shot and run away if you end up in their line of sight, but don’t scope in to shoot at them. Focus on helping the tank battle with your cooldowns and always have sleep ready when Ashe has BOB. Another crucial piece of advice is to learn the proper strafing pattern for Ana, which is side-to-side (AD) movement only, without crouching, as crouching reduces the movement of Ana’s head hitbox dramatically.Another suggestion is throwing a sleep dart immediately after Widow shoots, and praying it lands. If successful, you can move to a closer piece of cover if possible. Ashe is harder to navigate but less punishing if you try to challenge her. You can hipfire at her from behind cover like a Hanzo if you’re trapped. If you can tag Ashe a couple of times and force her behind her own cover or to her supports, that’s generally good enough.Tips for contesting Widow. Time her shots and peek briefly to go for a sleep dart or primary fire before quickly getting back to cover. If you land the sleep, throw a nade and hit a shot on her as the nade splashes and wakes her up to maximize burst damage. Abuse her fall off range by staying 60 or more meters away so she can’t one-shot you, but make sure you’re at full health. Learn and use good movement, and get a read on their skill level to adjust your aggression accordingly.In final words, while it’s not ideal for Ana to take on Widow and Ashe alone, there are strategies to mitigate their impact and buy time for your team. Focus on positioning, cooldown management, and smart movement to survive and provide value to your team.In competitive matches, teams often find themselves in situations where the enemy team has a significant advantage in terms of available ultimate abilities. This can be a frustrating experience, especially when it leads to winnable games slipping away. So, what can players do when faced with an unfavorable ultimate economy?
Dry Pushing
One strategy is to engage in a “dry push,” where your team intentionally fights without using any ultimates, even if it means losing the fight. The goal is to force the enemy team to waste more ultimates than necessary, evening out the economy for future engagements. However, coordinating a dry push can be challenging in lower ranks where communication and coordination are often lacking.
Targeted Ultimate Usage
If a dry push isn’t feasible, consider using your ultimates strategically to force out key enemy abilities. For example, using a Pulse Bomb to dive the enemy Zenyatta can force out a valuable Transcendence, which may have a longer cooldown than your own ultimate. This tactic requires good game sense and knowledge of ultimate charge rates.
Focusing Key Targets
Another approach is to focus on damaging or eliminating heroes with the most impactful upcoming ultimates, such as a Genji preparing for a Nanoblade or a Zenyatta with Transcendence. By pressuring these targets, you can delay or prevent them from using their ultimates effectively, buying time for your team to build up your own economy.
Baiting Out Ultimates
If you’re confident in your abilities, you can also try baiting out enemy ultimates by presenting yourself as a tempting target. This can be risky and may be seen as feeding if not executed properly, but if successful, it can force the enemy team to waste resources on a single pick, giving your team an opening to even out the ultimate economy.
Adapt and Communicate
Ultimately, the best course of action depends on the specific situation, team composition, and map. It’s essential to maintain good communication with your team, adapt your strategy as needed, and make the most of the resources you have available. We know that you can get bad teammates sometimes and lose all your SR, if that’s your case then look for cheap Duo Carry services and rank up stress free.Remember, even if the ultimate economy is not in your favor, games can still be won through smart plays, good positioning, and effective teamwork. Stay focused, make the most of your opportunities, and don’t get discouraged by temporary setbacks.As a new player in Overwatch, it can be challenging to determine which tank to use on each map and game mode. With a variety of options available, such as Ramattra, Orisa, and Wrecking Ball, it’s essential to understand their strengths and weaknesses to make the most of your gameplay. In this blog post, we’ll break down which maps are more appropriate for each of these heroes and provide some general advice on tank selection.
Orisa: A Versatile Choice
Orisa is a solid choice for almost every map in Overwatch. Her versatility and adaptability make her a reliable pick in most situations. Whether you’re playing on attack or defense, Orisa’s shield and fortify ability can help your team maintain a strong presence on the battlefield.
Wrecking Ball: Excelling on Specific Maps
Wrecking Ball, affectionately known as “Ball,” is a highly mobile tank that thrives on maps with ample high ground and open spaces. Some of the best maps for Ball include:
Ilios
Numbani
Busan
Rialto
Route 66
Shambali Monastery
Watchpoint: Gibraltar
Blizzard World
Paraiso
However, Ball may struggle on maps like Lijiang Tower, where the tight spaces and lack of high ground can hinder his mobility and effectiveness.
It’s crucial to be aware of the enemy team’s composition and adapt accordingly. If you’re playing Wrecking Ball and the enemy team has a Sombra, it may be wise to switch to Orisa to avoid being constantly hacked and rendered ineffective. Similarly, if you’re playing Ramattra and the enemy team has heroes like Mauga, Orisa, or Zarya, consider switching to Orisa or Ball to counter their playstyle. If you’re unsure about the meta or counter-picks, look into Duo Carry services. These can help you learn and rank up with a pro in your team!
Beware of Ana
Regardless of your rank, Ana is one of the most challenging heroes to play against as a tank. Her ability to heal allies and disable enemies with her sleep dart and biotic grenade can be incredibly frustrating. Be mindful of her presence and try to coordinate with your team to take her down.
Ultimately, the key to success as a tank in Overwatch is to understand the strengths and weaknesses of each hero and adapt to the map and enemy team composition. By mastering a variety of tank heroes and knowing when to switch, you’ll be well on your way to becoming a formidable force on the battlefield.With the recent buffs to Wrecking Ball, also known as “Ball,” it’s becoming increasingly common to have him on your team in Overwatch 2. However, Ball is a unique tank with drastically different strengths and weaknesses compared to other tanks. This guide aims to help players understand how to effectively play alongside a Ball and adapt their playstyle to maximize the team’s potential.
Ball’s Unique Advantages:
Resource Efficiency: Ball requires the least amount of in-combat healing among all tanks, making him an excellent choice when paired with supports like Zenyatta and Lucio who have limited healing output but strong synergy with Ball in other aspects.
Selfish Playstyle: Ball plays selfishly, allowing his teammates to also play selfishly. While he may not offer much direct protection, he excels at setting up and confirming kills at a minimal cost to the team’s resources.
Adapting to Ball Comps:
Commit to Full Dive or Accept Split Comps: When playing with Ball, teams can either fully commit to a dive composition or adopt a split comp, which consists of two groups playing different styles (Dive and Poke).
Understanding Space in Ball Comps: Space in Ball comps is more about pressure than physical presence. When Ball draws the attention of multiple enemies, it creates theoretical advantages for the rest of the team.
General Tips:
Don’t chase Ball to heal him. Let him come to you when the fight slows down.
Focus on enabling your team and finding your own picks rather than solely healing Ball.
Use pings to communicate target focus and peel needs.
Adapt to Ball’s movement and be prepared to stabilize or retreat when necessary.
Avoid micromanaging the Ball player and trust their experience in dealing with counters.
Don’t be scared to ask for help. Look into these cheap Duo Carry options. Everyone needs some help sometimes!
Hero Synergies:
Sombra: Arguably the best synergy for Ball, providing scouting, dive setup, and EMP combos.
Long Range Hitscan: Effective at following up on Ball’s piledrivers and capitalizing on the space he creates.
Flyers (Pharah, Echo) + Mercy: Create a dual threat that forces the enemy to split their attention.
Kiriko: Enables an assassin playstyle, provides utility with Suzu, and benefits from Ball’s mobility for repositioning.
Zenyatta + Brigitte or Ana + Brigitte: Historically strong support combos with Ball, offering a mix of pick potential, survivability, and burst healing.
In final words:
Playing with a Wrecking Ball can be challenging, but by understanding his unique playstyle and adapting accordingly, teams can maximize their potential. Focus on playing selfishly, finding picks, and managing resources effectively. Choose heroes that synergize well with Ball’s kit and playstyle, and avoid micromanaging the Ball player. With practice and coordination, mastering the art of playing with Wrecking Ball can lead to incredible success in Overwatch 2.As a casual Overwatch player, you may find it challenging to climb the competitive ladder, especially if you’re limited on time. However, with the right mindset and approach, it’s possible to improve your rank and enjoy a more fulfilling gaming experience. Here are five tips to help you rank up as a casual player:
Focus on your strengths
Identify the heroes and roles that you excel at and prioritize playing them in your matches. By focusing on your strengths, you’ll be able to make a more significant impact on the game and contribute to your team’s success. Don’t feel pressured to fill roles you’re less comfortable with, as this may hinder your performance and overall enjoyment of the game.
Communicate effectively
Effective communication is crucial in Overwatch, regardless of your rank. Make an effort to communicate with your team, calling out enemy positions, ultimate ability usage, and coordinating pushes or retreats. Positive and constructive communication can help foster a better team environment and increase your chances of success.
Adapt to your team’s playstyle
In the metal ranks, you may encounter a wide variety of playstyles and team compositions. Instead of getting frustrated with your teammates’ decisions, try to adapt to their playstyle and find ways to complement their strengths. Be willing to make adjustments to your own gameplay to better suit the needs of your team.You can always get help from someone. Like looking into getting a Duo Carry. This is a great way to rank up quick without any stress.
Prioritize objectives over kills
While eliminating enemies is important, focusing too heavily on kills can detract from the primary objectives of the game. Prioritize capturing or defending objectives, and work with your team to secure key map locations. By playing the objective and supporting your teammates, you’ll have a greater impact on the match’s outcome.
Learn from your losses
Losing streaks can be disheartening, but it’s essential to view them as opportunities for growth. Take the time to analyze your replays, identify your mistakes, and consider what you could have done differently. Focus on improving your own gameplay, rather than dwelling on factors beyond your control, such as teammate performance or unusual team compositions.Remember, ranking up as a casual player is a gradual process that requires patience and persistence. Celebrate your victories, learn from your defeats, and most importantly, enjoy the game. By maintaining a positive attitude and implementing these tips, you’ll be well on your way to climbing the ranks and finding greater satisfaction in your Overwatch experience.
 I’ve clocked enough late-night games to confirm a pattern: the matchmaking pool from 10 PM to 4 AM gets chaotic. If you want consistency, climb outside of that window. Skill deltas are more manageable, build metas stabilize, and you face fewer smurf stacks and troll queues.Also, night queue brings wild build variance, which can be either fun or disastrous depending on your expectations. If you’re testing theory-crafts or off-meta builds, queue then. If you’re grinding rank? Do it during peak hours.
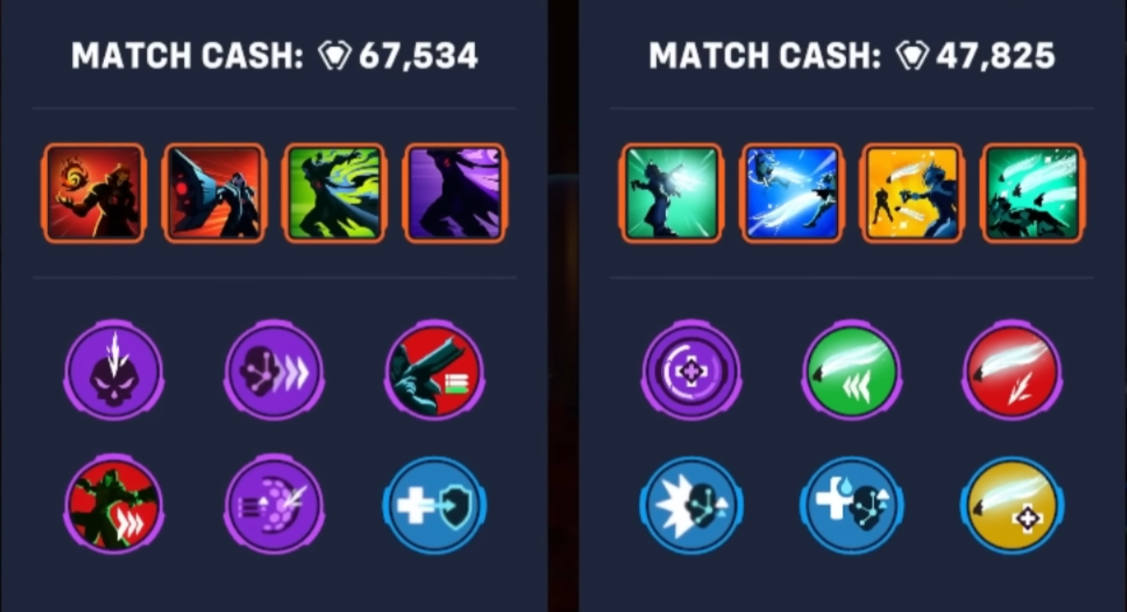 Here’s a cheat sheet for quick wins if you’re solo queueing or trying new heroes:
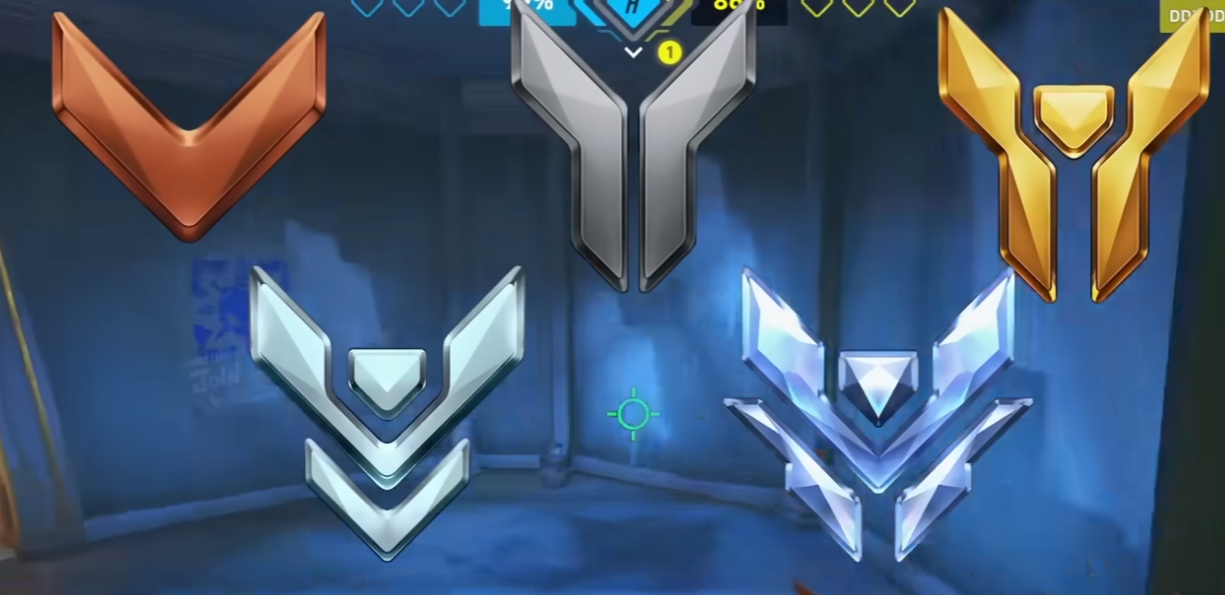

 Dealing with a Pharmercy combo can be frustrating, especially in the Gold ranks where team coordination and hero picks may not always be optimal. However, by communicating with your team, targeting key enemies, positioning yourself carefully, and adapting your hero selection, you can overcome this challenge and lead your team to victory.Remember, overcoming a Pharmercy is a team effort. While it may feel like you need to solo-carry, focusing on what you can control and working with your team is the key to success. Stay positive, communicate effectively, and keep improving your skills, and you’ll be well on your way to climbing the competitive ladder.Reaper is a powerful and intimidating hero in Overwatch, known for his close-range combat prowess and ability to flank enemies. If you’re looking to improve your Reaper gameplay, especially against heroes like Winston, this guide will provide you with valuable tips and strategies to help you dominate the battlefield.

 Top 500 Ana Main Wonfella, currently sitting at a 59% win rate over 12 hours this season, shared some valuable advice. The number one tip against Ashe and Widow as Ana is to never scope unless you are 100% sure they can’t see you or reposition to gain line of sight on you. Scoping in reduces your movement by 65% and cuts down your FOV significantly, making it harder to realize when they gain sight on you. Remember that it is not bad to reach for help if you seem stuck. There are services like Duo Carry that can help you learn and rank up.Trying to kill them on your own is not recommended. Instead, mark them with one shot and run away if you end up in their line of sight, but don’t scope in to shoot at them. Focus on helping the tank battle with your cooldowns and always have sleep ready when Ashe has BOB. Another crucial piece of advice is to learn the proper strafing pattern for Ana, which is side-to-side (AD) movement only, without crouching, as crouching reduces the movement of Ana’s head hitbox dramatically.Another suggestion is throwing a sleep dart immediately after Widow shoots, and praying it lands. If successful, you can move to a closer piece of cover if possible. Ashe is harder to navigate but less punishing if you try to challenge her. You can hipfire at her from behind cover like a Hanzo if you’re trapped. If you can tag Ashe a couple of times and force her behind her own cover or to her supports, that’s generally good enough.Tips for contesting Widow. Time her shots and peek briefly to go for a sleep dart or primary fire before quickly getting back to cover. If you land the sleep, throw a nade and hit a shot on her as the nade splashes and wakes her up to maximize burst damage. Abuse her fall off range by staying 60 or more meters away so she can’t one-shot you, but make sure you’re at full health. Learn and use good movement, and get a read on their skill level to adjust your aggression accordingly.
 In final words, while it’s not ideal for Ana to take on Widow and Ashe alone, there are strategies to mitigate their impact and buy time for your team. Focus on positioning, cooldown management, and smart movement to survive and provide value to your team.In competitive matches, teams often find themselves in situations where the enemy team has a significant advantage in terms of available ultimate abilities. This can be a frustrating experience, especially when it leads to winnable games slipping away. So, what can players do when faced with an unfavorable ultimate economy?
 Remember, even if the ultimate economy is not in your favor, games can still be won through smart plays, good positioning, and effective teamwork. Stay focused, make the most of your opportunities, and don’t get discouraged by temporary setbacks.As a new player in Overwatch, it can be challenging to determine which tank to use on each map and game mode. With a variety of options available, such as Ramattra, Orisa, and Wrecking Ball, it’s essential to understand their strengths and weaknesses to make the most of your gameplay. In this blog post, we’ll break down which maps are more appropriate for each of these heroes and provide some general advice on tank selection.
 Ultimately, the key to success as a tank in Overwatch is to understand the strengths and weaknesses of each hero and adapt to the map and enemy team composition. By mastering a variety of tank heroes and knowing when to switch, you’ll be well on your way to becoming a formidable force on the battlefield.With the recent buffs to Wrecking Ball, also known as “Ball,” it’s becoming increasingly common to have him on your team in Overwatch 2. However, Ball is a unique tank with drastically different strengths and weaknesses compared to other tanks. This guide aims to help players understand how to effectively play alongside a Ball and adapt their playstyle to maximize the team’s potential.
 Remember, ranking up as a casual player is a gradual process that requires patience and persistence. Celebrate your victories, learn from your defeats, and most importantly, enjoy the game. By maintaining a positive attitude and implementing these tips, you’ll be well on your way to climbing the ranks and finding greater satisfaction in your Overwatch experience.

